The AutoDos system is blocked.
Switch the dishwasher off.
Clean the lower spray arm:
Remove the lower basket.
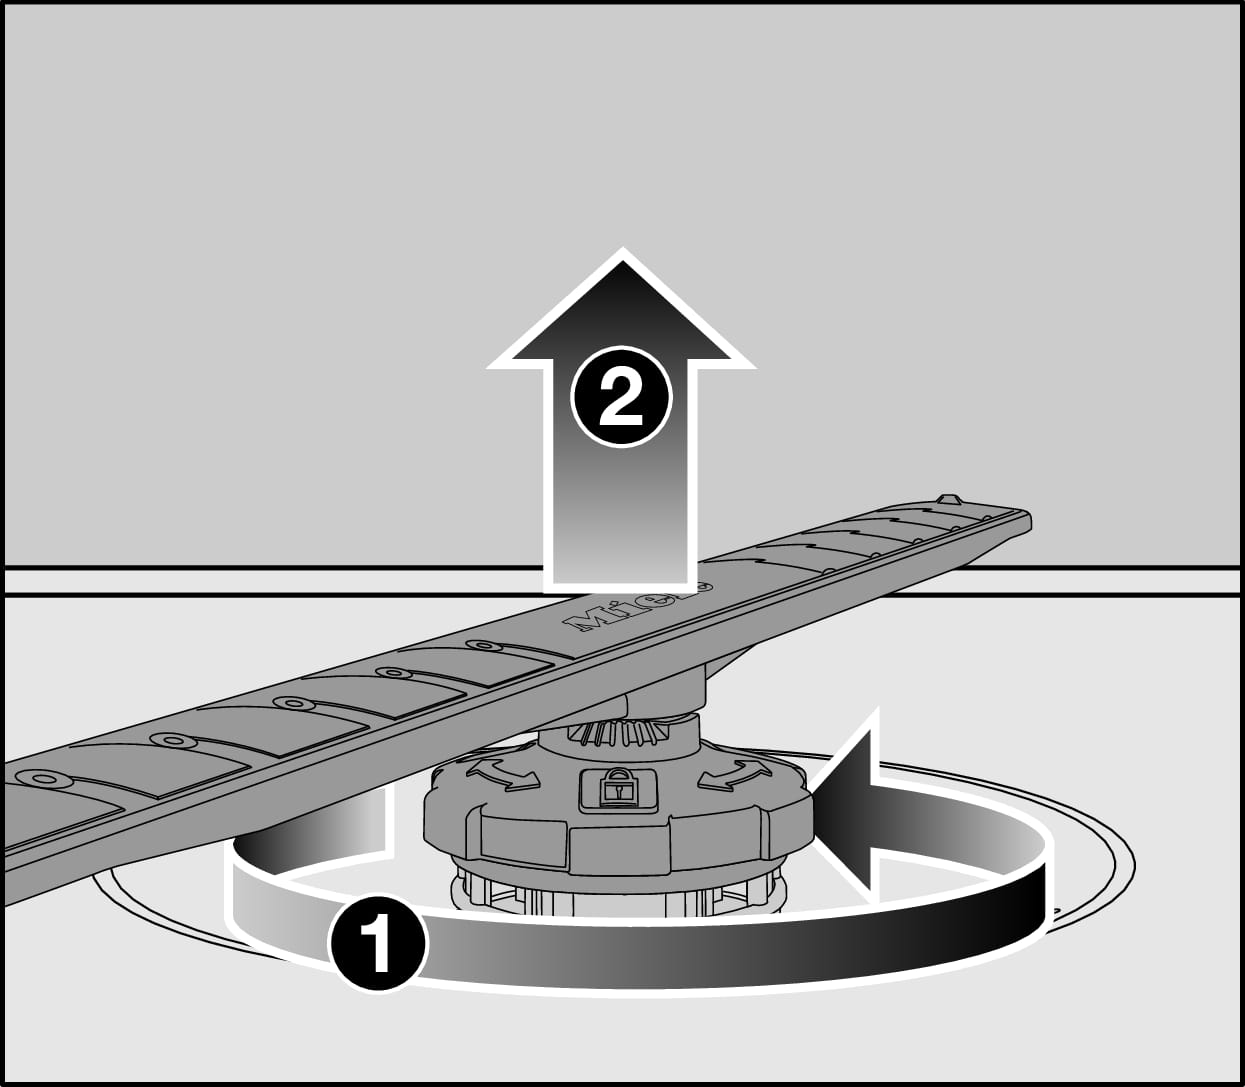
Rotate the screw thread of the lower spray arm anti-clockwise (view from above) and pull the spray arm upwards to remove .
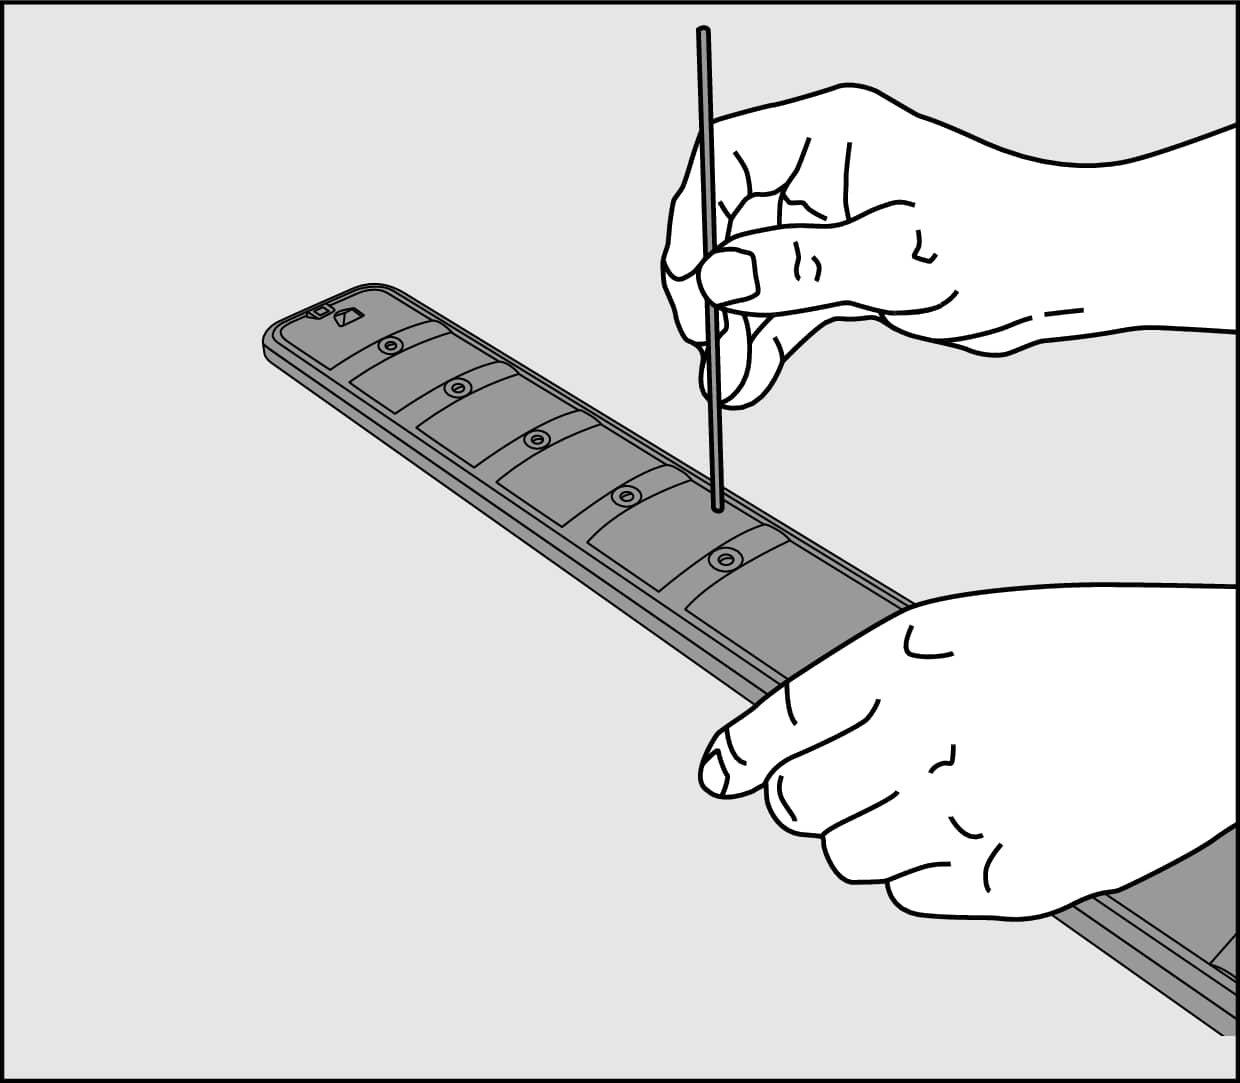
Use a pointed object to push food particles that are stuck in the spray arm nozzles into the spray arm.
Rinse the spray arm thoroughly under running water.
Refit the lower spray arm. Ensure that the filter combination lies flat in the base of the wash cabinet.
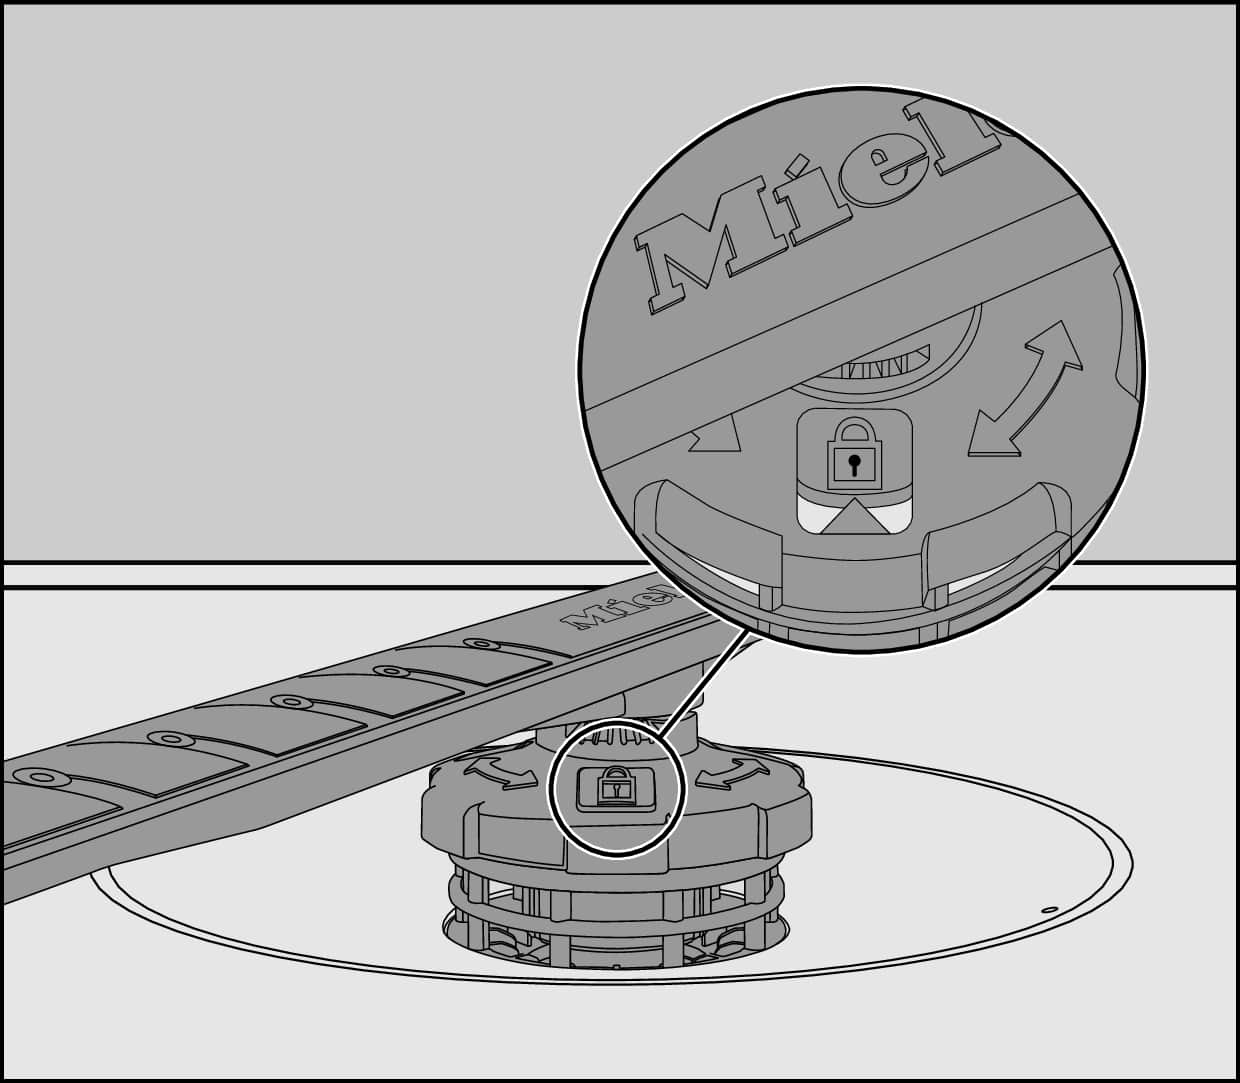
Rotate the screw thread of the lower spray arm clockwise (view from above) until the arrow in the viewing window points to the lock symbol .
Check to ensure the spray arm can be rotated freely.
Clean the AutoDos system:
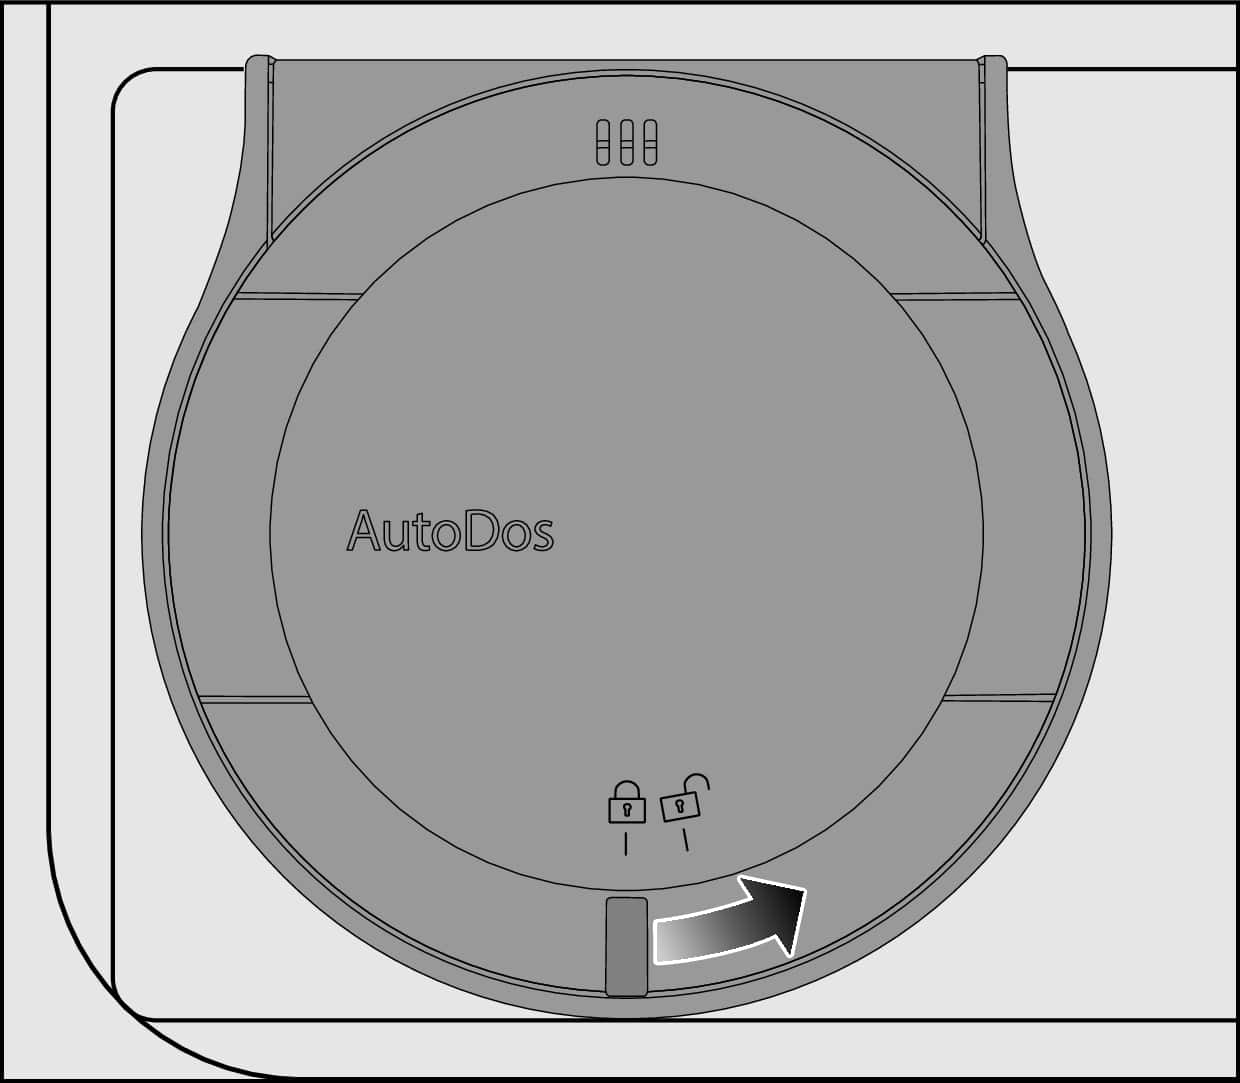
Turn the AutoDos lid to and open it.
Remove the PowerDisk.
Depending on the model, your dishwasher will feature either AutoDos 1.0 or AutoDos 2.0.
View of AutoDos 1.0
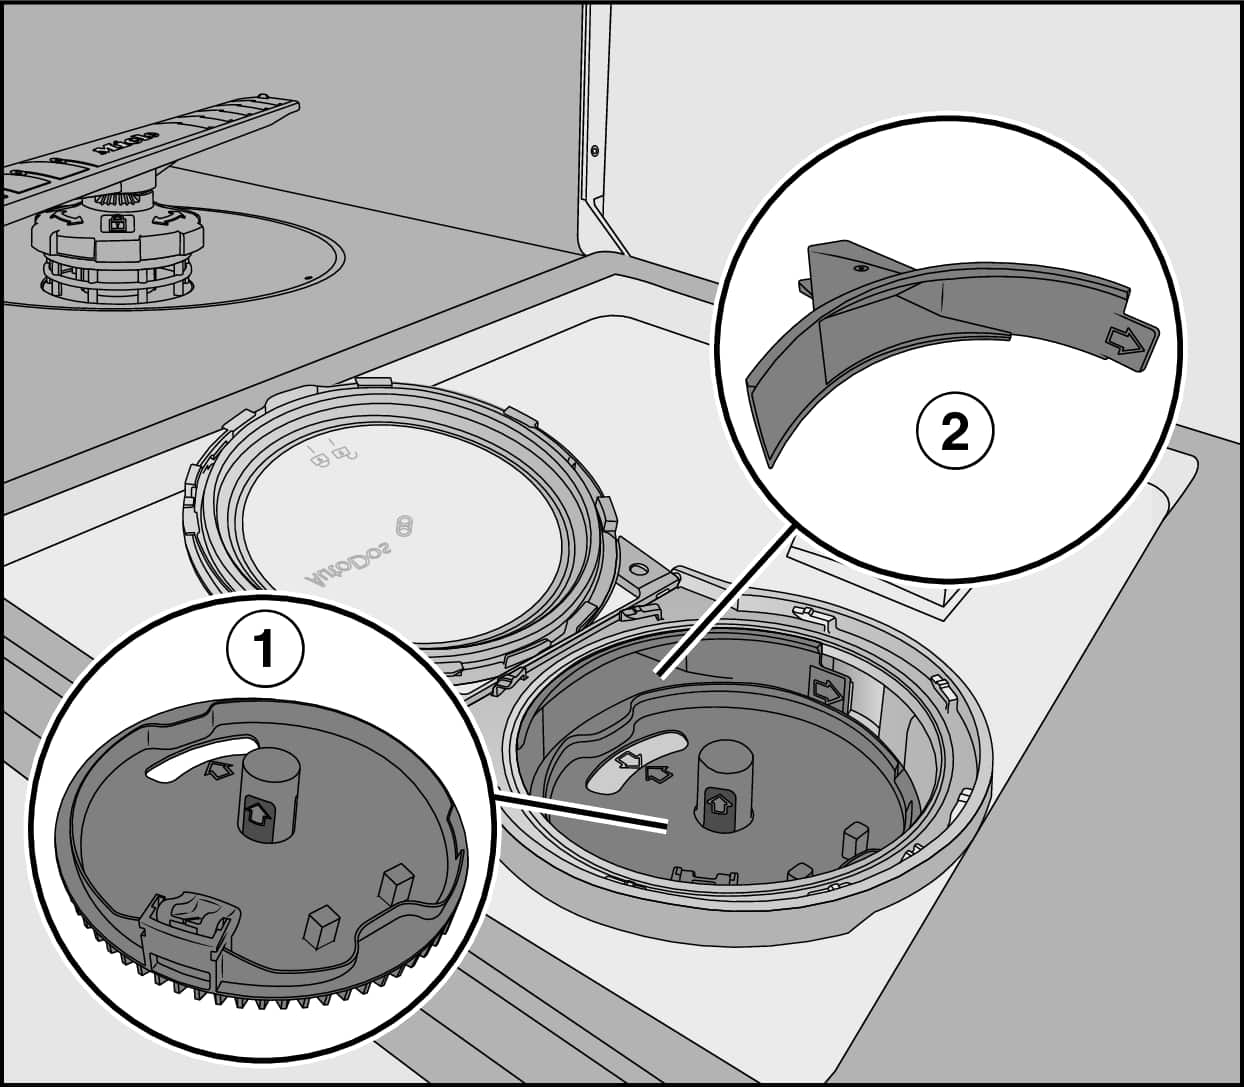
PowerDisk holder
Fill channel for dispensing the detergent from the PowerDisk into the wash cabinet
View of AutoDos 2.0
PowerDisk holder
Yellow opening tag for unlocking the PowerDisk holder
Yellow tabs on the PowerDisk holder
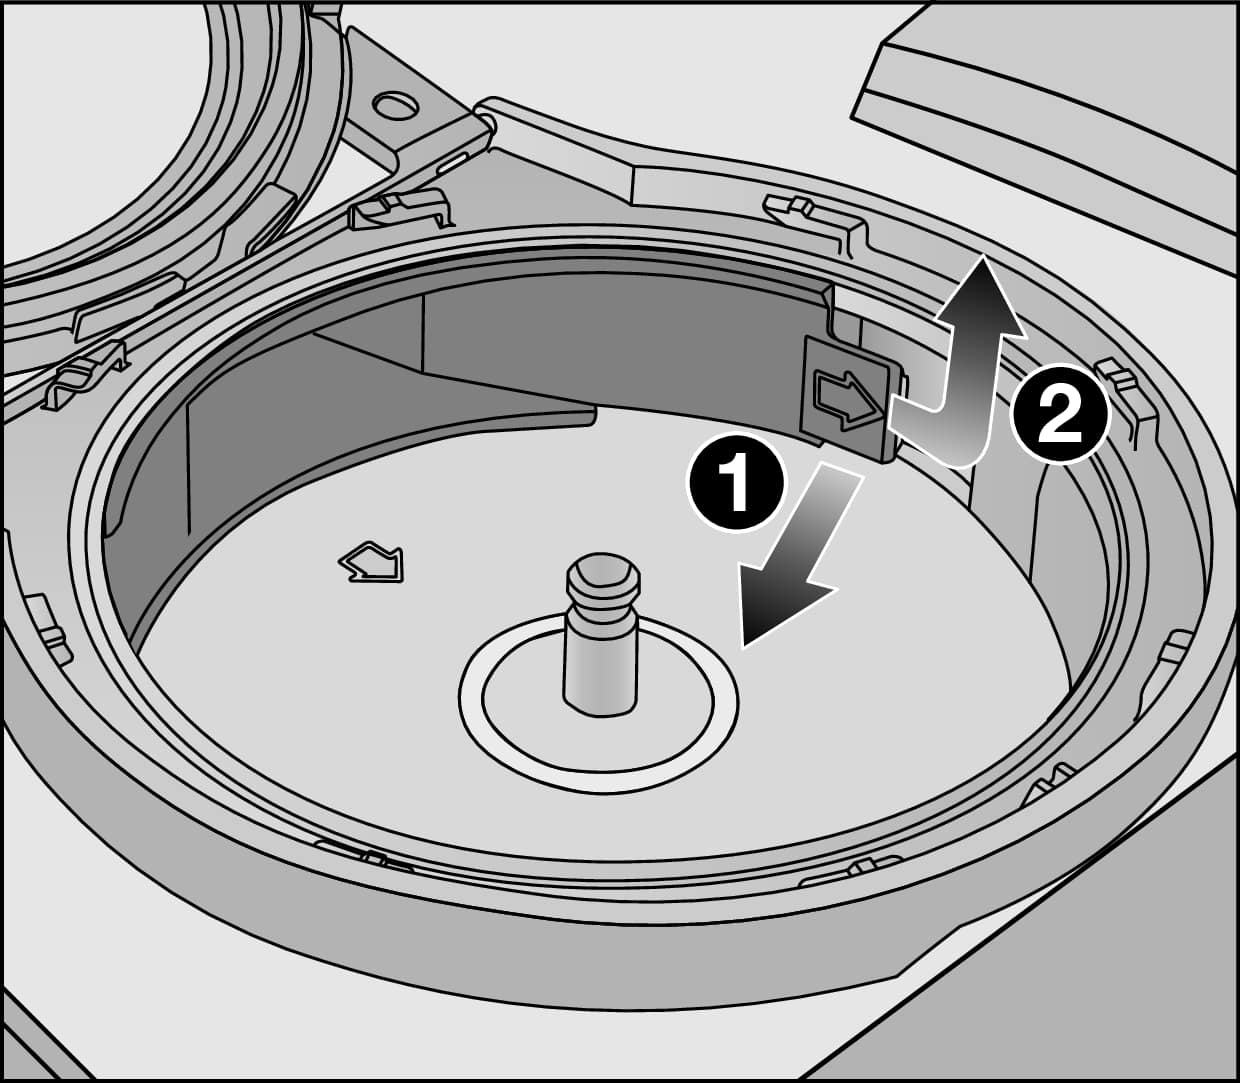
Cleaning AutoDos 1.0:
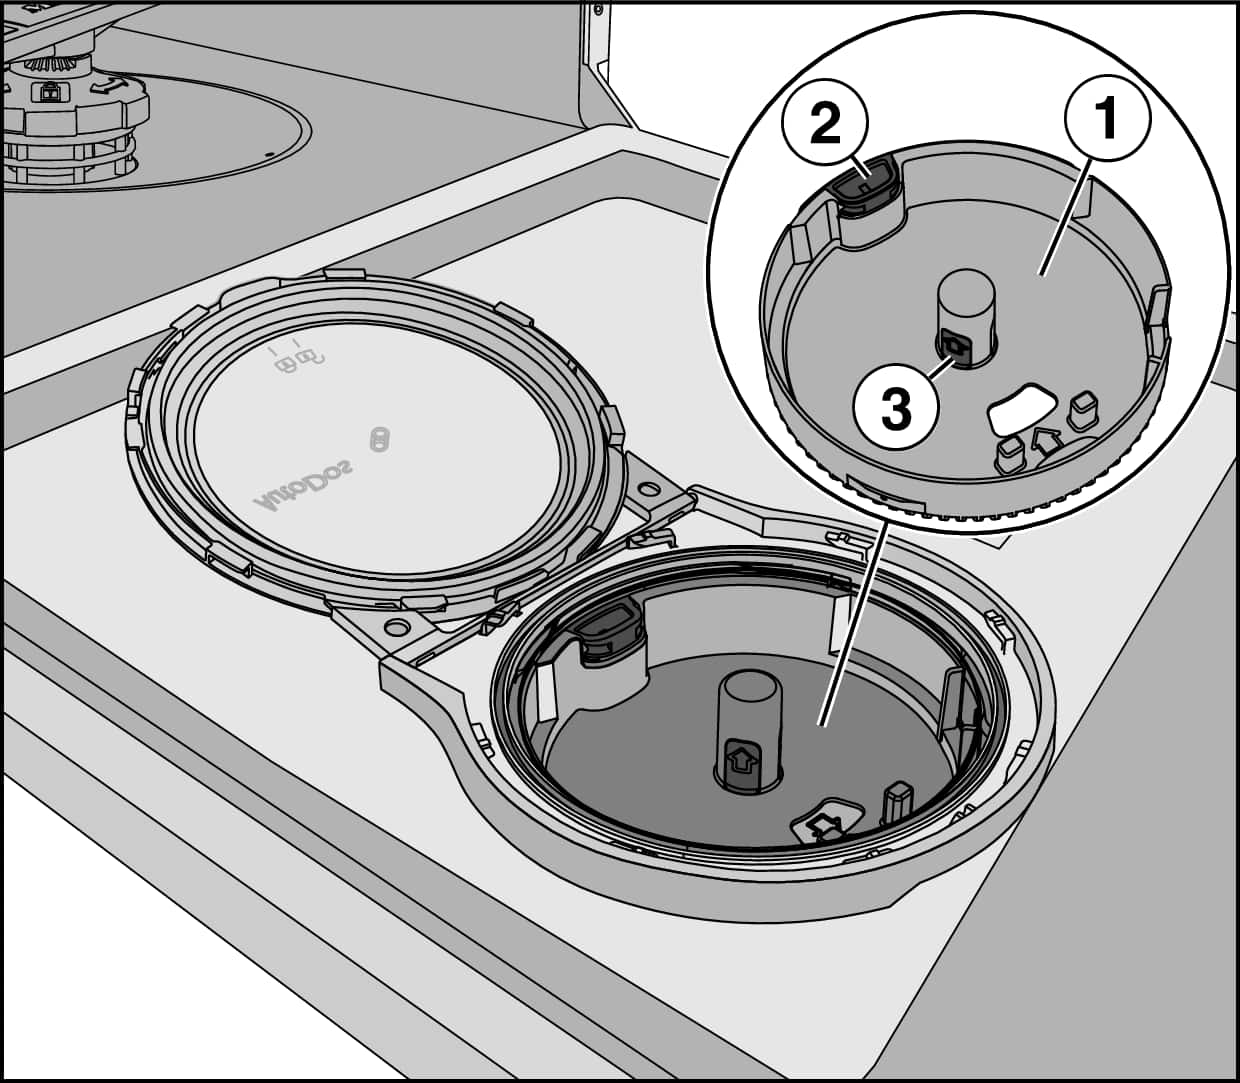
Pull the PowerDisk holder upwards by the yellow tabs and remove it. Make sure you do not tug the opening tag on the side.
Clean the AutoDos housing and the PowerDisk holder with a damp cloth.
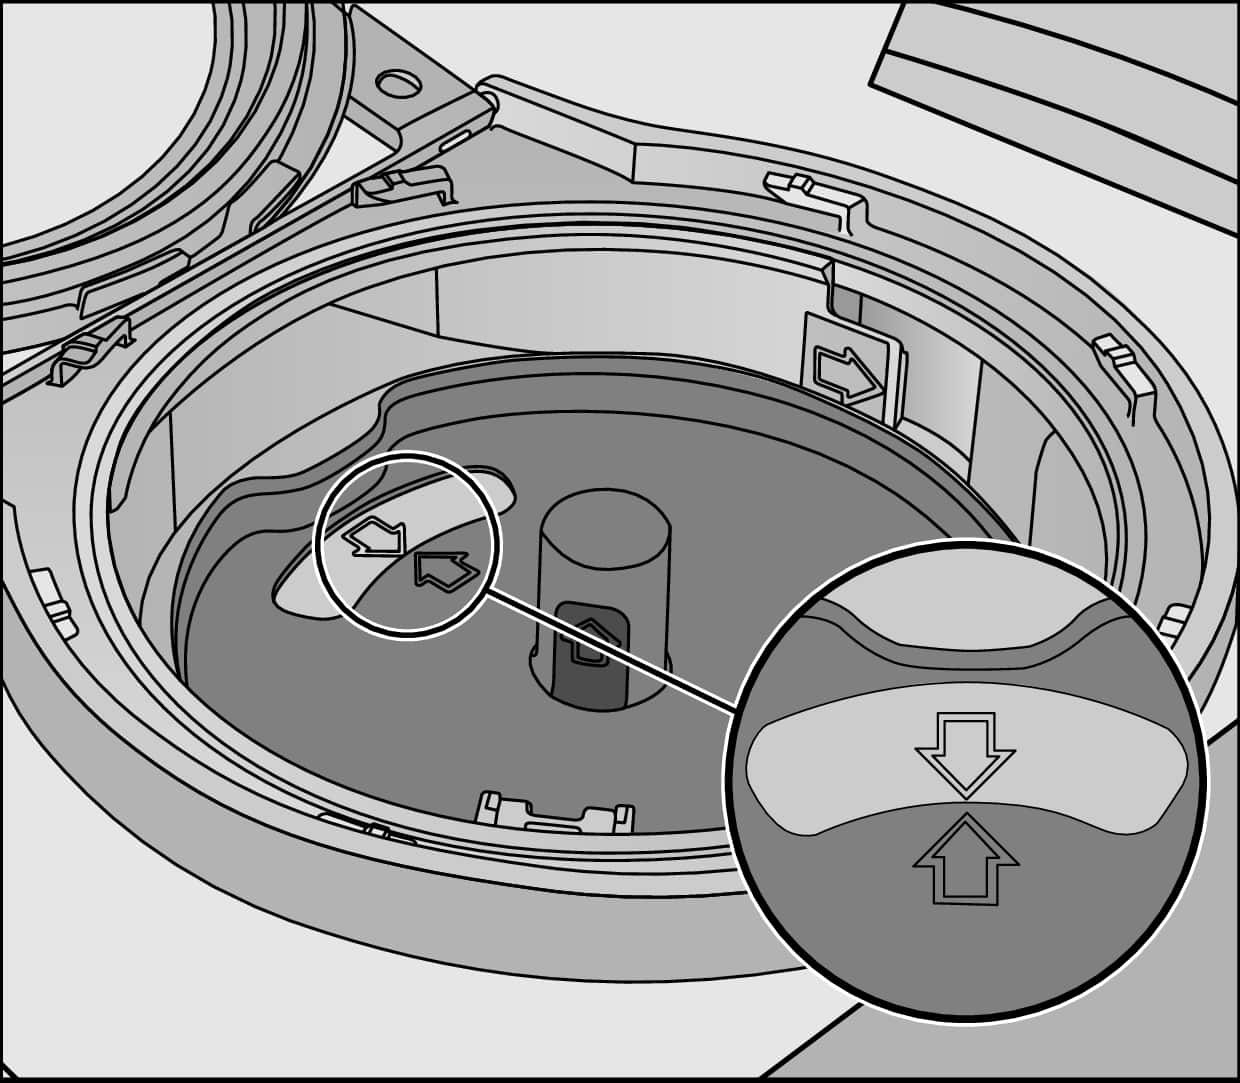
Tug the opening tag to release the fill channel (arrow) . Remove the fill channel .
Clean the fill channel using water and a soft brush.
Dry all parts well so that the powder granulate does not clump together.
Insert the fill channel again until the opening tag clicks into place.
Put the holder back into place so that the arrows in the PowerDisk holder and in the viewing window point towards each other. The holder must lie flat.
Cleaning AutoDos 2.0:
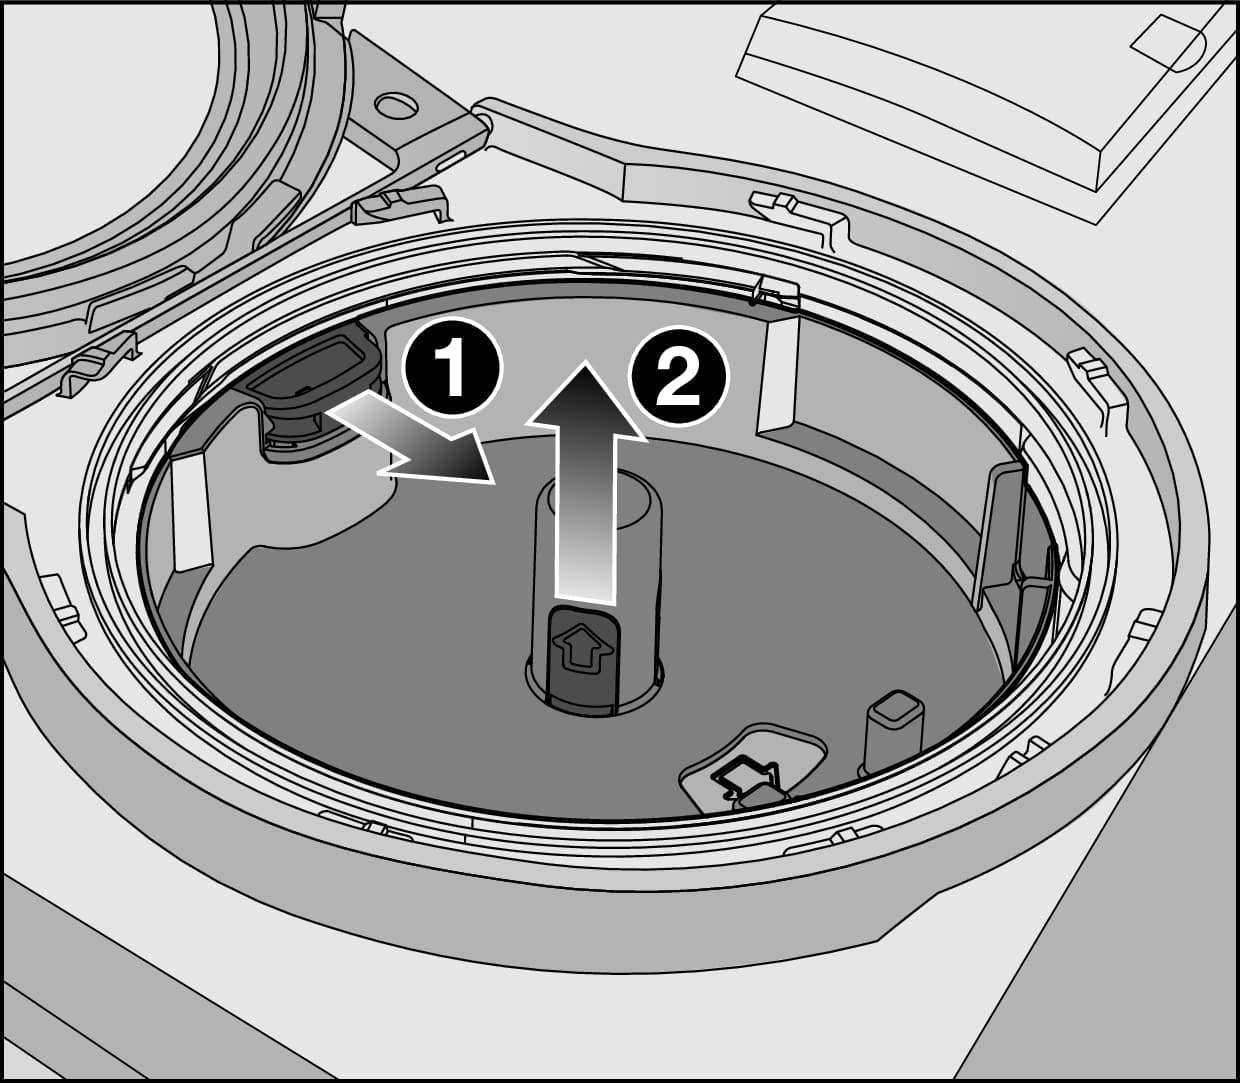
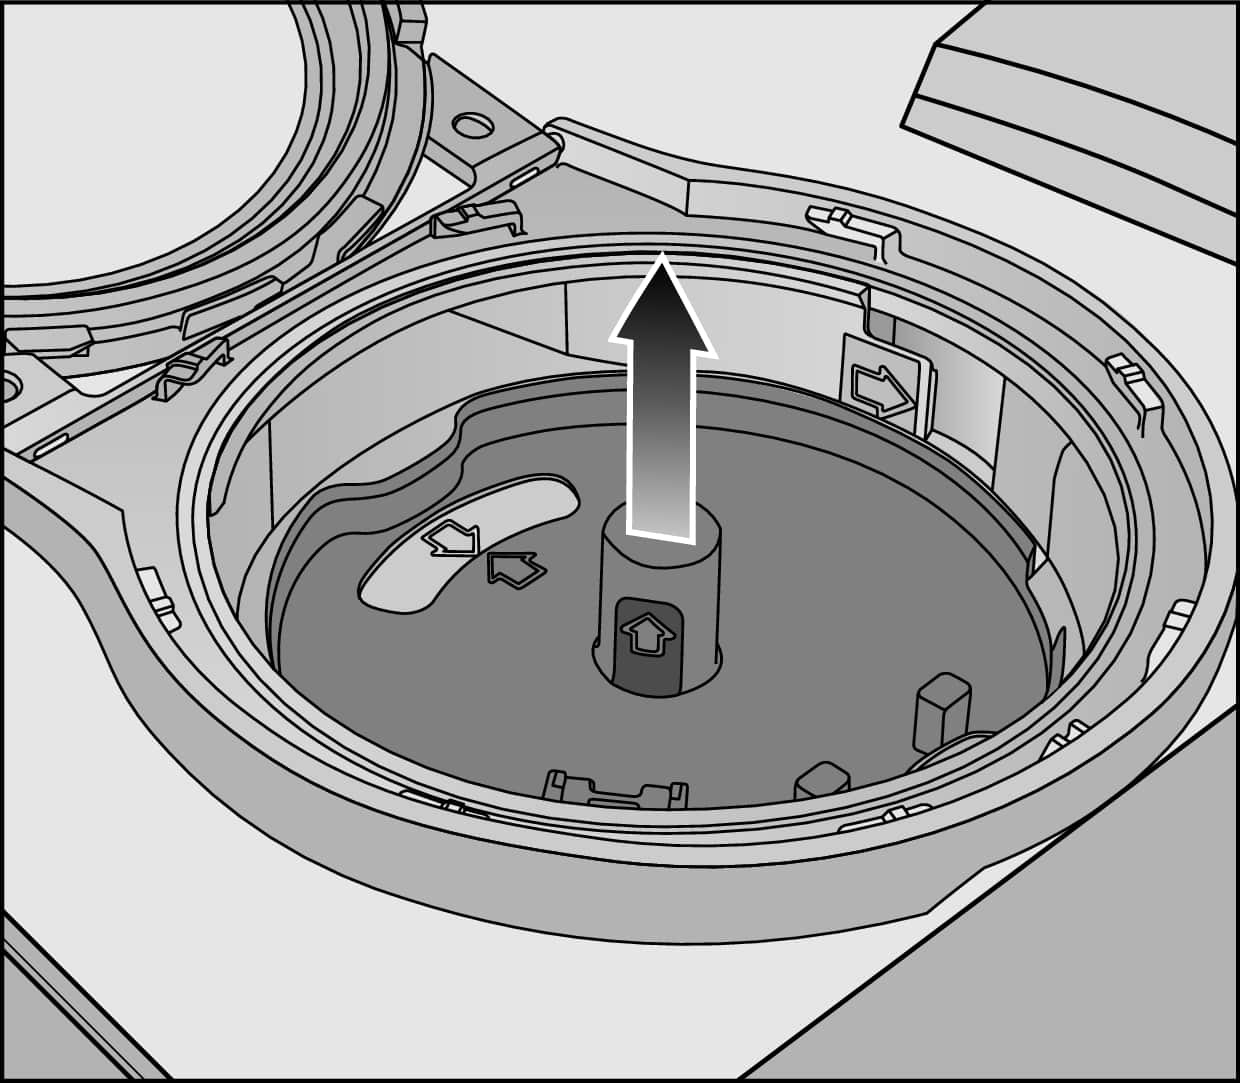
Unlock the PowerDisk holder by tugging the yellow opening tag in the direction of the arrow . At the same time, pull the PowerDisk holder upwards by the yellow tabs and remove it .
Clean the AutoDos housing and the PowerDisk holder with a damp cloth.
Dry all parts well so that the powder granulate does not clump together.
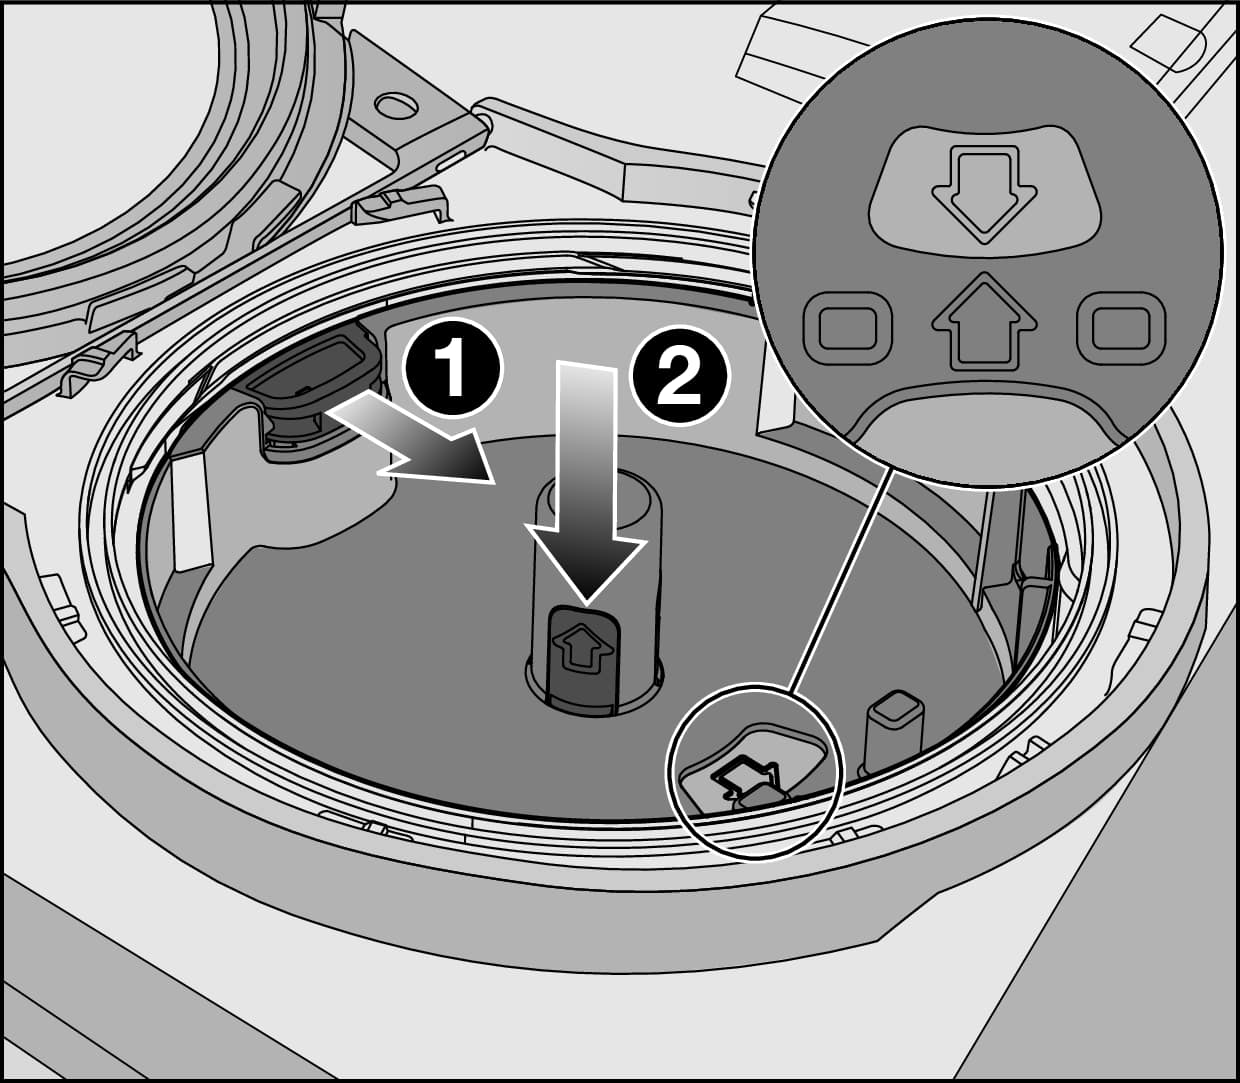
Pull the yellow opening tag in the direction of the arrow . At the same time, reinsert the PowerDisk holder . To do this, the arrows in the PowerDisk holder and in the viewing window must point towards each other. The holder must lie flat.
Insert a full PowerDisk. Press down the PowerDisk evenly until it sits flush.
Close the AutoDos lid and turn it until the lid handle is directly below the symbol.
If the fault persists, please contact Miele Customer Service or book a repair appointment online.


